Fitting a V8 into a Capri isn't really as easy as it's said to be. Well, it might be for some, but since I'm not a mechanic it's a challenge. The capri engine bay certainly has the size over a cortina or an escort, and actually has more room between the towers than a falcon!
If I was doing it again it would be much easier. So I'll share some of the issues I came accross so hopefully it's easier for you.
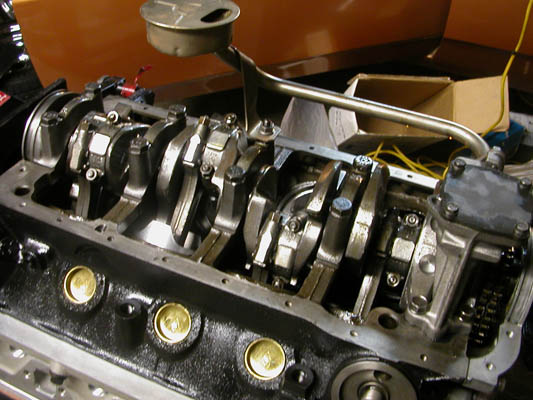
My original plan was simple, buy a late model 302 windsor with EFi etc and just stick it in as is. My first problem was really that I didn't know much about V8s.. A 302 is the easy fit over a 351.. because the 351 is taller it also makes the width wider as also.. which just makes it that much more difficult. So I stuck with a 302. I bought a imported HO 5.0i. Unfortunately it wasn't actually a HO.. but rather a low output emissions model. And worse than that, it was completely fuct.
I didn't know this at the time of course, Once I opened it up and so the state of the insides I knew it was needing a rebuild.

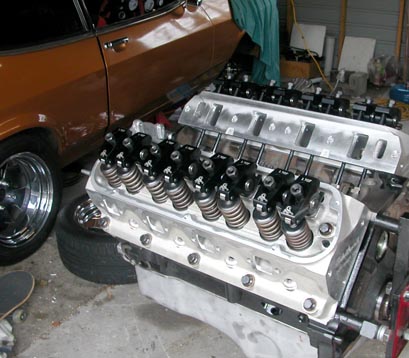
That came to the second problem, I started replacing and upgrading parts and before I knew what that happening I'd completely blown my budget. My heads were crap E6 heads, pretty much the worst heads. E7's can be okay with some porting, GT40 heads are better still. But for the price of getting some alloy Edelbrock items I couldn't resist just doing that.
My crank was fuct too.. in fact, the only good part of the engine was the block. Which is a bonus at least because it's the block itself that can be the weak point with windsors. My block was in great cond. and didn't need re-boring.
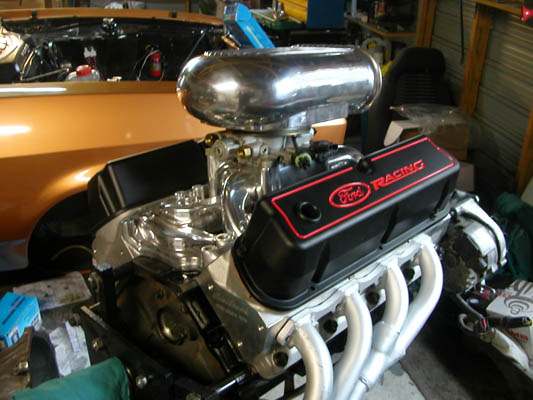
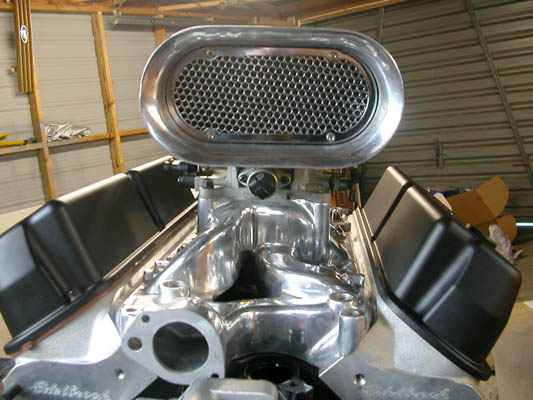
Then came the injection sage, because I had upgraded the heads to Edelbrock's, I found that the factory EFi manifold wouldn't flow enough air for them. They are quite nasty really, the HO mustang ones are pretty good, and the Explorer ones are even better. I ended up buying a Edelbrock EFi intake to go with it. After which I later realised wouldn't fit under a capri bonnet and it wasn't the 'oldschool appeal' that I wanted. So I sold that and bought a Air-Gap manifold and a Holley TBi which I will run with a LINK ECU. That way it looks like oldschool carb with a Hilborn scoop but with EFi benefits.
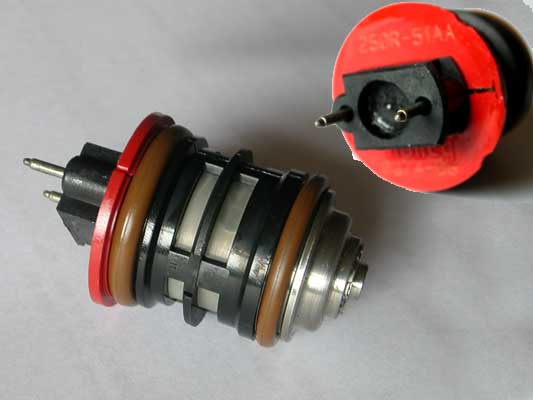
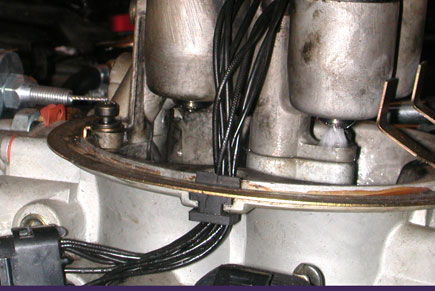
The TBi runs four of these badboys.. I found two of mine to be faulty and finding replacements
was a bit of a bitch. Eventually hunting on Ebay found some. They are just rebadged bosh items
and I found lots of them available but knowning what model car has the same from factory is
a nightmare.. and nobody in the USA seemed willing to guess for me.. they all want part and model
numbers where as I'm asking 'for a V8 in a Capri running a Holly TBi injection..' too hard basket I think..
Anyway with the engine build growing to expensive proportions I still had to buy parts to put it in. The crucial mistakes in this build were made in this area. I bought a 'kit' from TeamBlitz in the USA. The kit came with engine mounts, gearbox mount and sump and pickup. I also bought custom 302 windsor capri headers from australia. -dont buy custom parts from overseas- the only parts I eventually could use was the gearbox mount! The engine mounts just didn't work, after numerous emails to teamblitz I realised that I was biking up a hill. They looked like laser cut peice of steel made into a standard engine mount with a rough plate of steel welded on (with terrible welds) so you can sit the engine where you want. The problems was that to use this plate the mounts had go on one way. And in doing so ment that it was impossible to get a rubber isolater in. Basically we realised that the mounts must have been made backwards, by swapping them around and welding on a plate going the other way we got them to work with 10mm re-enforced rubber isolator. If you want to know what material to use here, we used a square cut out of a old race tyre! Sounds budget but it's a good source of steel re-inforced rubber. Tuff as, I went through 5 grinding discs cutting out the squares.
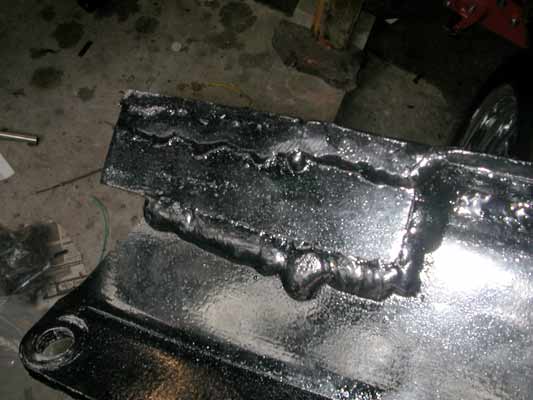
I reckon they must have a poorly trained monkey doing the welding at Teamblitz...
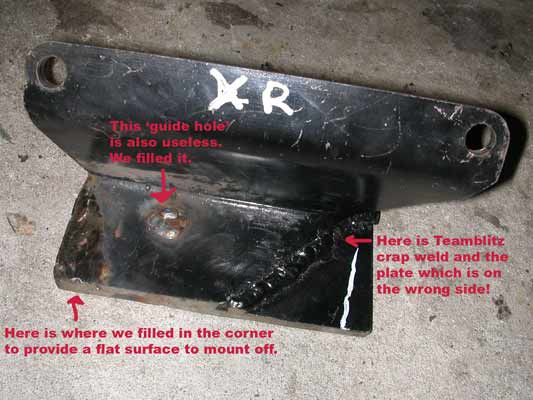
The extractors cost me heaps by the time they were imported and payed tax etc. Thought I was saving myself hassle. Neither of them fitted properly, so both sides were re-made in the end. Gearbox mount worked well at least. Next time I would recommend just getting such parts made locally.
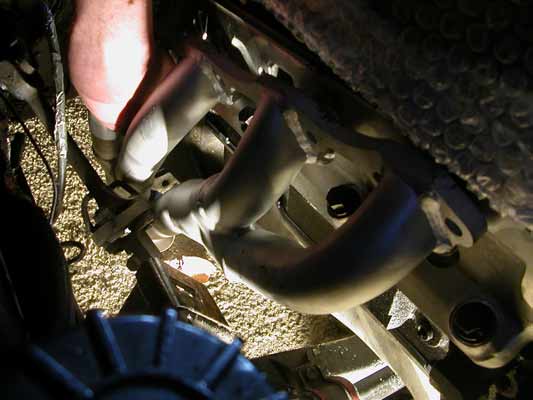
Another burn. Castlemaine Rod Shop in Australia. There extractors were expensive, crap quality,
too small at the collector and they didn't even fit.
I had them pretty much completely rebuilt.
The steering arm is the main problem. Getting the extractors to fit around them is a tightish fit. It's easy enough for a exhaust place to do however. The safety hoop that goes over the rubber isolator had to be removed. It's still quite close so I think I will try and get a heat shroud around it somehow.
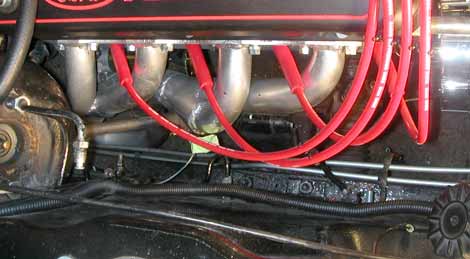
Here are the finished extractors. You can see the kink needed to clear the steering.
The collectors were widened and flow as duals right under the car. The Castlemaine
ones just collected into one crap pipe which hung too low anyway.
Sump. You are supposed to use a bronco sump for a windsor capri. Quite hard to find in NZ I had one ordered as part of the 'kit.' Well, it didnt work. First trial fit proved that there was no physical way to fit that sump in the capri unless the firewall was cut and the engine recessed right back. Even then I could see that the sump hung so low that it would affect ground clearance. Just by shear luck the original sump that come with my engine was a twin-pan type bronco sump. This fitted perfectly. They are both in fact bronco sumps, the first being a later model one which doesn't work without firewall mods and the other being a early twin-pan style which works perfectly, although shallower, it keeps ground clearance reasonable if you capri is lowered.
Physically getting the engine and box in is pretty straight forward. Its all the little things which take and cost heaps. Bigger radiator, learn't that alloy and iron positively corrode. So fitting a brass/copper radiator with alloy heads would mean that my heads would wear out first. So I went for an alloy item. Got it custom made as I couldn't find anything to suit. If you want a copper/brass one then a good option is a VN/VK Commodore V8 one. Fits well.

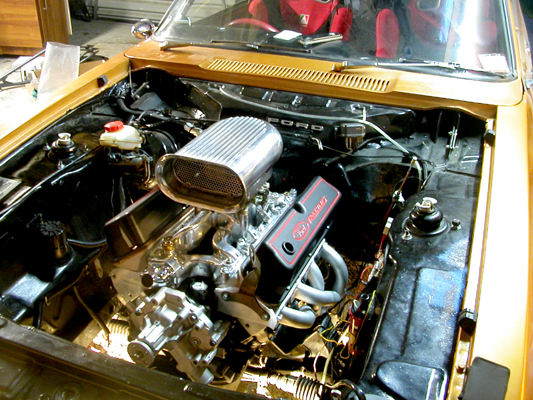
Working out how far to put the engine - I looked around a few V8 capris, you want the engine as far back as possible. If you don't want to cut the firewall then the trick is to bash the crap.. I mean, 'massage' the curve where the tunnel meets the firewall back a inch or two. So that when the gearbox is right back you can JUST get a ring-spanner onto the top bellhousing bolts. I found this seemed to be the best place for the engine to go. AND you can, just, get the hoses on for the heater! :-)
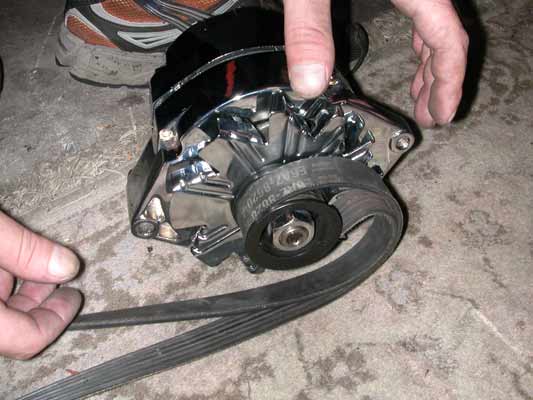
Removing all the unsused pulleys and pumps, and running a single belt setup means you have to swap water pumps. The later model pumps run backwards and if you get this wrong your engine will overheat. My pulleys wouldn't line up properly as they were designed to run with two belts. I solved that by removing a pulley off an un-used emissions pump and cutting out the centre and welding it two the pulley of the water pump so that if offset the belt far enough to line up with the crank and alternator.
 |
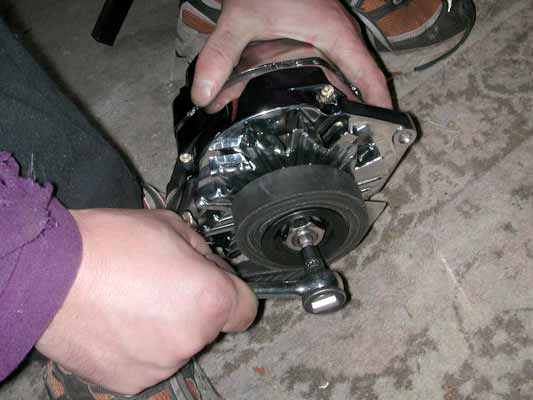 |
Here is a little trick from Simon - Can't get your pulley off your alternator? Wrap an old serpentine
belt around it tightly, the opporsite way to what you will turning. Hold with your foot and it should
hold fast while it undoes the nut.
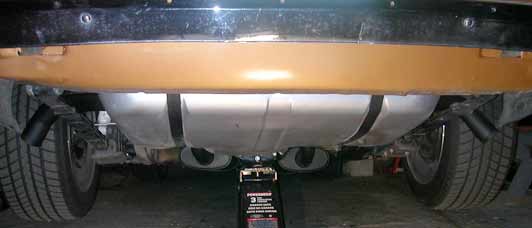
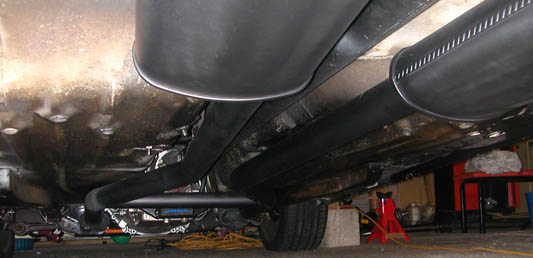
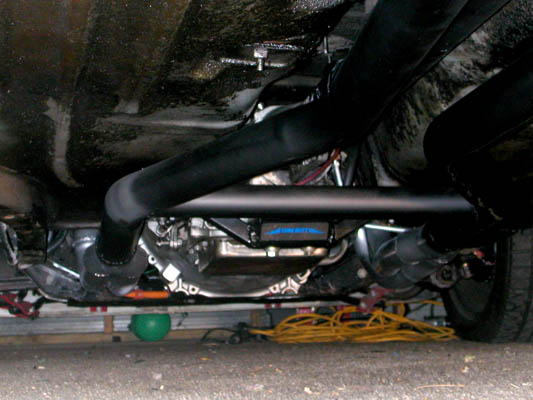
Here is the finished exaust system. I toyed with the idea of side exit pipes but worked out that
with the car so low it's possible that they could catch on something and get ripped off. So
went for the classic bogan look:
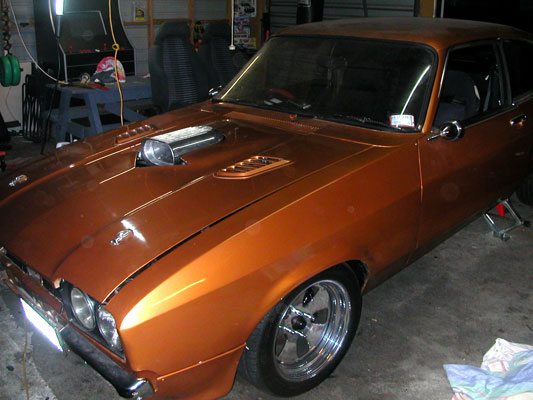
Here is the bonnet on with the hole cut, I already had some holes here that I had to incorporate
and it actually worked out pretty well.
The engine is now a runner, just needs to be dyno tuned as rather than running it in with the carb
like the original plan we decided just to go straight to the throttlebodies. I tried to get a good pic of
them spraying fuel but my camera wasn't really up to it in the dark.
Major work today, took it down to DCHmotorsport for a day of tuning. Solved some of the major hangups I've had until now. Firsly.. the firing order was wrong. Sounds stupid but it's a common mistake with teh V8's, esp Ford and Holden ones cos they keep changing them. I figured it was the later firing order since it was a later model engine, but no.. it's the early firing order. So that made a big difference. Then there were a few other issues, incorrect temp sensor for the link made the computer think it was cold all the time and kept putting fuel in when we didn't want it. We also had the wrong output on the Link module for the dizy, and the TPS wasn't wiring up properly but that didn't matter while were stayed on MAP.
After lots of backfires and me blowing out fires that kept lighting up out of the intake we got it purring along. Then it blew a rad hose off and put water everywhere cos the fans fuse had blown..
Finally a major fang for a road tune out to TaiTapu.. first time I'd driven the car for exactly 20 months! Was good. Real good. Just a stab of the throttle pulls you into the seat and sends you down the road like a cork out of a bottle. I really enjoy the power delivery of a large engine and think it suits me and the car much more than the 2L turbo did. Awesome exhaust note and sound and sight of the bug catcher rumble away in front of you is nothing short of orgasmic. She doesn't feel too heavy in the front either.. a wee bit but nothing outrageous. Drinks fuel like a demon though. I put 30L in before I took it to DCH and still had to take the DCH van down to the gas station to get another 20L.. now I'm almost empty again!! lol it was hard to put it back in the garage after taking it home but.. can't afford any tickets atm.
Results: 246 hp at rear wheels 240lbft @ 3900rpm (325nm)
.jpg)
New Update 2013
I became tired of the automatic (and the colour it's Black now if you haven't noticed). Turns out I didn't end up doing much drag racing like I thought I would and the auto was a bit annoying. The C4 is a small, strong unit. But it's clunky and the revs would sit at around 3000rpm at 100kmph. It would also launch and chunk into reverse and was generally a pig.
I decided I wanted to shift gears again and gain some highway legs. So a Borg Warner T5 manual was the thing.
Don't get the cheaper 6 cylinder T5's, they are different. You need a V8 one and you want the World Class T5. Everyone calls their T5's 'world class' but they're not. The one which has stronger internals is the one with the Timkin bearing obvious behind the bellhousing. The non-T5's just have what looks like a blanking plug there. This is the ONLY way (I know of) of spotting the difference easily. If you're looking at a T5, make sure you look for the Timkin bearing. (fastforward to 1:10 of this video - this isn't me but you can see what I'm talking about: http://www.youtube.com/watch?v=TeIN-BaG2SU)
Anyway, the T5 will share the same mount as the C4, and it's the same length so you don't need to shorten driveshaft.
I put a new cluch in and used a mustang cable and fork.
At the same time I decided to put a decent cam in. Now, there are cams and there are cams. If you want something special and not the off-the-shelf grinds that keep getting churned out. Then you want a Kennelly Cam. http://www.kcams.co.nz talk to PK and he'll get you something that does the business exactly how you want it.
So, with just a cam change and the box change. I was back on the dyno for a massive increase in power.
Results: 310hp at rear wheels 316lbft @ 4300rpm (428nm)
.jpg)
